Tuesday, September 27, 2016

Method to Display a Weather Forecast on Your Blogger

Method to Display a Weather Forecast on Your Blogger

Before anyone use this widget, we will be giving some significant reasons why you should use it too, mainly discussing about its function. Let’s assume a visitor from London, England landed on your site. Now this widget would fetch the data from local weather company and would provide its details accurate. Now if the day is sunny, rainy, cloudy and etc.

Process to add weather in blogger: 

The first thing you need to do is to login into your blogger dashboard. Now go to Template >> Edit HTML >> and search for the skin tag, just above it paste the following piece of CSS coding (you can customize the code if you like, but we are certain that the default one would just be right for everyone).

MyWeatherDiv .centerContainer {
    width: 300px;
    text-align: left;
    margin-bottom: 200px;
}
.green {
    color: #a6e22d;
}
.teal {
    color: #66d9ef;
}
.purp {
    color: #ae81ff;
}
.pink {
    color: #f92772;
}
.yellow {
    color: #e6db74;
}
.white {
    color: #f8f8f2;
}
.grey {
    color: #616161;
}
.f12 {
    font-size: 12px;
}
.MyWeatherDiv img {
    height: 64px;
    width: 64px;
}
.weatherInfoRight {
    z-index: 999;
    position: fixed;
    top: 10px;
    right: 10px;
}
.weatherInfoLeft {
    z-index: 999;
    position: fixed;
    top: 10px;
    left: 10px;
}
.weatherInfoBottomRight {
    z-index: 999;
    position: fixed;
    bottom: 10px;
    right: 10px;
}
.weatherInfoBottomLeft {
    z-index: 999;
    position: fixed;
    bottom: 10px;
    left: 10px;
}
.MyWeatherDiv {
    display: none;
    background-color: #272822;
    padding: 5px;
    -webkit-border-radius: 10px;
    border-radius: 10px;
}
.MyWeatherInfo {
    text-align: center;
    font-family: 'Segoe UI',Tahoma,Helvetica,Sans-Serif;
    color: white;
    font-size: 14px;
}
#divMyImage {
    display: none;
}
.MyWeatherClose {
    font-family: 'Segoe UI',Tahoma,Helvetica,Sans-Serif;
    cursor: pointer;
    position: absolute;
    right: 10px;
    color: white;
    font-size: 20px;
}
.MWTemperature {
    display: block;
}
.MWPlace {
    display: block;
}
.MWIP {
    display: block;
}
#clear-day {
    display: none;
}
#clear-night {
    display: none;
}
#partly-cloudy-day {
    display: none;
}
#partly-cloudy-night {
    display: none;
}
#cloudy {
    display: none;
}
#rain {
    display: none;
}
#sleet {
    display: none;
}
#snow {
    display: none;
}
#wind {
    display: none;
}
#fog {
    display: none;
}

The second thing is to add the JavaScript file that does the work quite brilliantly. Within your blogger template search for the </head> tag and just above it paste the following JS Coding. (We recommend you to please host the script on your own either on Google Drive or any other service because our script might go down if our quota of bandwidth gets full).

<script type="text/javascript" src="https://dl.dropboxusercontent.com/u/137869302/weather.js"></script>

Lastly, add this styling javascript file just above the </body> tag. You can change the position of the gadget by replacing  position: "right" to left or center. There are many other options for your customization, which could be useful to match your site’s setting.

<script type="text/javascript">
$.MyWeather({
    position: "right",
    showpopup: true,
    temperature: "c",
    closeicon: true,
    showicon: true,
    showtemperature: true,
    showlocation: true,
    showip: true,
    size: 80,
    iconcolor: "white",
    fontcolor: "white",
}, function (e, f, g, a, d, b, c) {
    $("#txtCity").html(e);
    $("#txtCountry").html(f);
    $("#txtIP").html(g);
    $("#txtLatitude").html(a);
    $("#txtLongitude").html(d);
    $("#txtTemperature").html(b);
    $("#picTemp").attr("src", c)
});
</script>

We hope this tutorial may have helped you in learning How to display weather forecast on Your Blogger site. Do give it a try, and let us know what are your thoughts about our latest development by commenting your opinions below.

Method to Display Most Commented Posts in Blogger


Method to Display Most Commented Posts in Blogger

People often ask us a common question, how they can showcase a list of most commented posts in the sidebar of their blog. Showing a list of the content that is most discussed is indeed a great way to encouraging new users to join in the conversation. It also benefits in building an active community that means more engagement and more readers would be jumping into your website. In this article, we will demonstrate that how to display most commented posts in blogger?


The very first thing you need to do is to login to your blogger account with the help of your Gmail ID and password. Once you are successfully entered to Blogger Dashboard, go to Layout >> Sidebar >> Add a gadget >> Add HTML/JavaScript and in the HTML Text box paste the following piece of code:

<!-- Popular posts with comment count Start -->
<script type="text/javascript">
function getYpipePP(feed) {
 document.write('<ol style="">');
 var i;
 for (i = 0; i < feed.count ; i++)
 {
var href = "'" + feed.value.items[i].link + "'";
var pTitle = feed.value.items[i].title;
var pComment = " \(" + feed.value.items[i].commentcount + "\)";
var pList = "<li>" + "<a href="+ href + '" target="_blank">' + pTitle;
 document.write(pList);
 document.write(pComment); //to remove comment count delete this line
 document.write('</a></li>');
 }
 document.write('</ol>');
 }
 </script>
 <script src="http://pipes.yahoo.com/pipes/pipe.run?
 YourBlogUrl=http://www.brainfy.blogspot.com/
 &ShowHowMany=10
 &_id=390e906036f48772b2ed4b5d837af4cd
 &_callback=getYpipePP
 &_render=json"
type="text/javascript"></script>
<span style="font-size: 80%; float:right;"><a href="http://www.brainfy.blogspot.com/2014/06/how-to-display-most-commented-posts-in-blogger.html">Make your own</a></span>
<!-- Popular posts with comment count End -->

After pasting the above code, you need to customize it to your desire needs, so do not forget to replace http://www.brainfy.blogspot.com with your blog URL. By default, it would display 10 most commented posts so to increase or decrease the count replace =10 with the number of posts you would like to display.

Once you have finished customizing the gadget, press the “Save” button to enable the gadget in the sidebar of your blog. Congratulations, you have successfully added a list of most commented posts in your blogger blog.

We hope this article have helped all those people who kept on messaging us about this gadget. Do let us know what are your feelings and thoughts about it. In case you are already using it then let us know about how it has helped you to engage more audience. If you found this article useful, then please return back by subscribing us at Google+, Facebook or Twitter.

How to Add Whatsapp Share Button in Blogger

 How to Add Whatsapp Share Button in Blogger

Blogger gives you the opportunity to promote your content via many social networks. Back in year 2009, when WhatsApp was launched, no one knew that it would challenge the graph of Facebook. In the year 2013, WhatsApp was declared as the most used social network, leaving Facebook behind. Today in this article, we will show you how to add whatsapp share button in blogger.


What Should You Add Whatsapp Share Button:

With the increased use of mobile phones by each passing day, it is necessary for you to make the best use of your phone by optimizing it and enabling it so share sites, writing content or anything you liked and want to share with your friends as well.

In the beginning WhatsApp was only a mobile feature but its increasing fame led to its availability on web as well. Now, just think about how beneficial it would be for you if one of your subscribers like any article on your blog and he shared it via WhatsApp, more the people view his shared article, more your website traffic will boost.


How to Add Whatsapp Share button in Blogger:

Before adding WhatsApp share button to blogger, first we will discuss its position. It is recommended to add such traffic boosting widgets at the end of your article instead of putting them to the side bar running along the entire length of your blog.

You can add WhatsApp share button with the help of following method:


Move your mouse pointer and go to Template >> Edit HTML. Look for your old share buttons. Add the following code with you previous share buttons. BE KEEN WITH THE CODES!

<!-- Whatsapp Share Buttons Start -->
<script type='text/javascript'>if(typeof wabtn4fg===&quot;undefined&quot;){wabtn4fg=1;h=document.head||document.getElementsByTagName(&quot;head&quot;)[0],s=document.createElement(&quot;script&quot;);s.type=&quot;text/javascript&quot;;s.src=&quot;https://dl.dropboxusercontent.com/u/7330191/whatsapp-sharing.js&quot;;h.appendChild(s);}</script>
<a class='wa_btn wa_btn_s' expr:data-href='data:post.url' expr:data-text='data:post.title' href='whatsapp://send' style='display:none'>Share</a>
<!-- Whatsapp Share Buttons End -->

Preview your template and then save it.

Once above all steps are executed successfully it means that you are successful in execution of the task assigned. Now you could preview the blog and need to save the changes to the template by pressing the orange “Save template” button.


How to Add Skype Share Button in Blogger

How to Add Skype Share Button in Blogger
You must have already used many social share buttons from major social networking brands like Facebook, Twitter, Google+, WhatsApp, etc. As the name suggests, share button makes it easier for you to share the content with your friends online on your social profile.  Skype the Microsoft owned company also has its own share button as well that allows you to send the content to your love ones, strength to their Skype chat.  Today in this article, we will show you how to add a Skype Share button in Blogger.

Why to Add Skype Share Button?

With the increase in the use of social networking websites, almost all web owners are looking to find different ways to drive traffic from social sites.
How to Add Skype Share Button in Blogger
Skype has about 30 million active users, having a Skype share button on your site provides you the opportunity that your content can be shared with millions of more users.

Having a Skype button could play a significant role is making your content go viral. There is always a 50% chance you might get some traffic, so why don’t you give it try?

How to add Skype Share Button?

To add Skype share button on your blogger site take a look at the following instructions.
The very first thing you need to do is to install the Skype share button script which will make the button function. So, go to Blogger >> Template >> Edit HTML >> and look for the </head> tag. Now, after finding the </head> tag, paste the following JavaScript code just above it:
<script>
// Place this code in the head section of your HTML file
(function(r, d, s) {
 r.loadSkypeWebSdkAsync = r.loadSkypeWebSdkAsync || function(p) {
  var js, sjs = d.getElementsByTagName(s)[0];
  if (d.getElementById(p.id)) { return; }
  js = d.createElement(s);
  js.id = p.id;
  js.src = p.scriptToLoad;
  js.onload = p.callback
  sjs.parentNode.insertBefore(js, sjs);
 };
 var p = {
  scriptToLoad: 'https://swx.cdn.skype.com/shared/v/latest/skypewebsdk.js',
  id: 'skype_web_sdk'
 };
 r.loadSkypeWebSdkAsync(p);
})(window, document, 'script');
</script>

Once everything is done, just save the Template.

Now paste the following code anywhere in your template where you want the share button to appear. In order to add share button in the sidebar go to Blogger >> Layout >> Add a gadget >> Add HTML/JavaScript and paste the code in the HTML text box.

<div class='skype-share' data-href='' data-lang='' data-text='' data-style='small' ></div>
You can change the size of the Share button following are the codes for different style and sized buttons:

Style Type Source Code
Small <div class='skype-share' data-href='' data-lang='' data-text='' data-style='small' ></div>
Circle Icon <div class='skype-share' data-href='' data-lang='' data-text='' data-style='circle' ></div>
Large <div class='skype-share' data-href='' data-lang='' data-text='' data-style='large' ></div>
Square <div class='skype-share' data-href='' data-lang='' data-text='' data-style='square' ></div>

When users will click the share button, it will ask them to sign in with their Skype ID, after logging in users will able to share your content with their friends on Skype.

We hope this article has helped you in learned how to add a Skype share button in Blogger. Though, it is still unclear whether users will choose Skype to share content but still its not a bad choice to give it a try. Let us know what do you think about it in the comments below.

How to Add Smooth Mouse Wheel Scrolling Effect in Blogger

How to Add Smooth Mouse Wheel Scrolling Effect in Blogger


Have you seen websites that add a smooth mouse wheel scroll effect? This is a great way to make the scroll movement smooth as it gives your users a better scrolling experience while reading long content. Recently, one of our users asked us about adding a smooth mouse wheel scroll effect in blogger. In this article, we will show you how to add smooth mouse wheel scroll effect in blogger.

Smooth mouse wheel scrolling effect makes your site easier to navigate. It adds vertical scrolling on your site allowing you to smoothly scroll up/down the webpage using mouse wheel

The very first thing you need to do is to go to Blogger >> Template >> Edit HTML, now in the template search for the </head> tag. After finding the </head> tag, just above it paste the following code.
<script type='text/javascript'>
/*<![CDATA[*/
/**
 *Smooth Scroll Mouse Wheel By Mybloggerlab.com
 */
(function() {
this.GambitSmoothScroll = function( settings ){
 if ( typeof settings === 'undefined' ) {
  settings = {};
 }
 var defaults = {
  'amount': 150,
  'speed': 900
 };
  for ( var key in defaults ) {
  if ( ! settings.hasOwnProperty( key ) ) {
   settings[ key ] = defaults[ key ];
  }
 }
 // Disable in mobile because we don't need smooth scrolling there
 if ( navigator.userAgent.match(/Mobi/)) {
  return;
 }
  this.settings = settings;
 this.startedAsTrackpad = false;
 this.start();
};

/**
 * Start our plugin
 */
GambitSmoothScroll.prototype.start = function() {
 document.addEventListener('DOMContentLoaded', function() {
  window.addEventListener( 'wheel', this.overrideScroll.bind(this) );
   }.bind(this));
};

/**
 * Stops the current scroll
 */
GambitSmoothScroll.prototype.stop = function( isDown, timestamp ) {
 if ( typeof this.scrollInterval !== 'undefined' ) {
  this.startedAsTrackpad = false;
  clearInterval( this.scrollInterval );
  this.scrollInterval = undefined;
 }
};

/**
 * Performs the smooth page scroll
 */
GambitSmoothScroll.prototype.newScroll = function( isDown, timestamp ) {
  // If the scroll went the opposite way, reset the scroll as if from full stop
 if ( isDown !== this.isDown && typeof this.isDown !== 'undefined' ) {
  this.stop();
 }
 this.isDown = isDown;
  // If called to scroll from a full stop, create our scroller loop
 if ( typeof this.scrollInterval === 'undefined' ) {
    this.startingSpeed = this.settings.amount;
  this.scrollInterval = setInterval( function() {
      // Perform the scroll
   var scrollBy = ( this.isDown ? 1 : -1 ) * this.startingSpeed / 15;
   window.scrollBy( 0, scrollBy );
   // Stop the scroller when the scroll becomes too small
   this.startingSpeed *= 1 - ( 900 / this.settings.speed ) / 10; // 0.9;
   if ( Math.abs( scrollBy ) < 1 ) {
    this.stop();
   }
  }.bind(this), 16.666666667 ); // 60fps
   // If called while the page is still scrolling, add more momentum to the current scroll
 } else {
  // Base the momentum multiplier on the delta time to avoid super fast scrolls
  var multiplier = 1 + ( timestamp - this.prevTimestamp ) / 40 * 0.7;
    // Limit the amount
  this.startingSpeed = Math.max( this.startingSpeed * multiplier, this.settings.amount );
  this.startingSpeed = Math.min( this.startingSpeed, 300 );
 }
 this.prevTimestamp = timestamp;
};

/**
 * Stops the default scroll behavior and does our own thing
 */
GambitSmoothScroll.prototype.overrideScroll = function(e) {
  // Normalize wheel delta scroll
 var delta = e.wheelDelta ? -e.wheelDelta / 120 : (e.detail || e.deltaY) / 3;
  /**
  * Basically, when we check the delta variable, trackpads give out a value of < 1 && < -1
  * mouse wheel scrolls give out a value >= 1 || <= -1
  * We can use this to turn OFF smooth scrolling for trackpads.
  *
  * IMPORTANT: Firefox in Mac somehow handles things differently.
  * the skipCheck variable handles things for FF in Macs
  */
  // Special for Firefox-Mac
 var skipCheck = false;
 if ( typeof window.mozInnerScreenX !== 'undefined' ) {
  if ( navigator.platform.indexOf( 'Mac' ) !== -1 ) {
   this.startedAsTrackpad = false;
   skipCheck = true;
   if ( e.deltaY === parseInt( e.deltaY, 10 ) ) {
    this.startedAsTrackpad = true;
    return;
   }
  }
 }
 if ( typeof this.trackpadTimeout !== 'undefined' ) {
  clearTimeout( this.trackpadTimeout );
  this.trackpadTimeout = undefined;
 }
  // If delta is less than 1, assume that we are using a trackpad and do the normal behavior
 if ( ( Math.abs( delta ) < 1 || this.startedAsTrackpad ) && ! skipCheck ) {
    this.trackpadTimeout = setTimeout( function() {
   this.startedAsTrackpad = false;
   this.trackpadTimeout = undefined;
  }.bind(this), 200 );
    this.startedAsTrackpad = true;
  return true;
 }
  // If the code reaches here, then scrolling will be smoothened
 // Disable normal scrolling
 e = e || window.event;
 
Now again in the template, search for </body> and just above it paste the following code.
<script type="text/javascript">
new GambitSmoothScroll({
    amount: 150, // The scroll amount
    speed: 900 // The scroll speed
});
</script>
Note: Make sure your blogger template has jquery.min.js or jquery.js file. In case you are unable to find this file on your blogger template then add it manually. Add the following code below the <head> tag.
<script src='http://ajax.googleapis.com/ajax/libs/jquery/1.7.2/jquery.js' type='text/javascript'></script>
Once everything is done, save the template by pressing “Save Template” button and you have successfully added a cool smooth mouse wheel scroll effect in blogger.

We hope this tutorial has turn out to be useful for those who were looking to add a smooth parallax mouse wheel scroll using jQuery on to their websites. If you have a better way of doing this job then feel free to leave a comment below. If you like this article, share it on Facebook, Twitter or Google+.
How to Add an HTML Sitemap Page in Blogger


How to Add an HTML Sitemap Page in Blogger

XML Sitemaps vs HTML Sitemaps

An XML created with the help of an XML markup language and are especially intended for search engines. You can create and submit your site's XML sitemap in webmaster tools, which will not only improve your site's crawling rate but also quick indexation of your site.
sitemap

On the other hand, HTML sitemaps are created with plain Hyperlink Text Markup Language and are especially intended for your website visitors. It is usually used to list all the post or pages that are published on your site.

You can check the demo of this widget here.

Adding an HTML Sitemap With All Posts in Blogger:

To add a HTML sitemap in blogger please follow the below instructions correctly:
    • The very first thing you need to do is to  add the CSS codes so you can make your sitemap look attractive. Go to Blogger >> Template >> Edit HTML >> Search for ]]></b:skin> tag and just above it paste the following code. You can also customize the below codes to match your style of template color scheme:
    /* Sitemap plugin By Brainfy */
    #bp_toc {
        color: #666;
        margin: 0 auto;
        padding: 0;
        border: 1px solid #d2d2d2;
        float: left;
        width: 100%;
    }
    span.toc-note {
        display: none;
    }
    #bp_toc tr:nth-child(2n) {
        background: #f5f5f5;
    }
    td.toc-entry-col1 a {
        font-weight: bold;
        font-size: 14px;
    }
    .toc-header-col1,
    .toc-header-col2,
    .toc-header-col3  {
    background:#9E9E9E;
    }
    .toc-header-col1 {
        padding: 10px;
        width: 250px;
    }
    .toc-header-col2 {
        padding: 10px;
        width: 75px;
    }
    .toc-header-col3 {
        padding: 10px;
        width: 125px;
    }
    .toc-header-col1 a:link,
    .toc-header-col1 a:visited,
    .toc-header-col2 a:link,
    .toc-header-col2 a:visited,
    .toc-header-col3 a:link,
    .toc-header-col3 a:visited {
        font-size: 13px;
        text-decoration: none;
        color: #fff;
        font-weight: 700;
        letter-spacing: 0.5px;
    }
    .toc-header-col1 a:hover,
    .toc-header-col2 a:hover,
    .toc-header-col3 a:hover {
        text-decoration: none;
    }
    .toc-entry-col1,
    .toc-entry-col2,
    .toc-entry-col3 {
        padding: 5px;
        padding-left: 5px;
        font-size: 12px;
    }
    .toc-entry-col1 a,
    .toc-entry-col2 a,
    .toc-entry-col3 a {
        color: #666;
        font-size: 13px;
        text-decoration: none
    }
    .toc-entry-col1 a:hover,
    .toc-entry-col2 a:hover,
    .toc-entry-col3 a:hover {
        text-decoration:underline;
    }
    #bp_toc table {
        width: 100%;
        margin: 0 auto;
        counter-reset: rowNumber;
    }
    .toc-entry-col1 {
        counter-increment: rowNumber;
    }
    #bp_toc table tr td.toc-entry-col1:first-child::before {
        content: counter(rowNumber);
        min-width: 1em;
           min-height: 3em;
        float: left;
        border-right: 1px solid #fff;
        text-align: center;
        padding: 0px 11px 1px 6px;
        margin-right: 15px;
    }
    td.toc-entry-col2 {
        text-align: center;
    }
    • Once everything is done, press Save Template button present at the very top of your screen.
    • Now Simply create a new page where you want to display your sitemap. Go to Blogger >> Pages >> New page. In the Blogger page editor, select HTML tab and paste the following code in the HTML code editor:
    <div id="bp_toc">
    </div>
    <script src='http://mybloggerlab.com/js/sitemap.js'  type="text/javascript"></script>
    <script src="/feeds/posts/summary?alt=json-in-script&amp;max-results=9999&amp;callback=loadtoc" type="text/javascript"></script>
    • After pasting the above code, you can write a title of your page. If you wish you can also disable comments because you would not like people posting comments on your sitemap. Once everything is done, press Publish button.
    We hope this article helped you learn how to add an HTML sitemap page in Blogger. If you enjoyed this article please share your thoughts in comments section below.

    Monday, September 26, 2016

    DRAGON DICTATE MAC 4 CRACK INCL SERIAL KEY

    DRAGON DICTATE MAC 4 CRACK INCL SERIAL KEY

    Dragon Dictate MAC 4 Crack License Key is the ultimate productivity tool that enables you to save time and get more done. Dictate, edit, transcribe and control your computer all by using your voice. It includes the powerful capability to accurately transcribe an audio file of any single speaker’s voice from podcasts or pre-recorded audio files. With just your voice, create and edit documents in Apple Pages 4.3, compose and manage email in Gmail, surf and search the Web and update your Facebook and Twitter status, to get things done quickly. Have fun and enjoy Dragon Dictate MAC 4 Crack License Key Free Download below.


    System Requirements


    CPU: Intel Core 2 Duo 2.4 Ghz or faster processor – Intel Core i3, i5 or i7 recommended
    A Free hard disk space of 3GB or more
    Supported operating systems are OS X Mountain Lion (10.8.3) or OS X Mavericks (10.9)
    A RAM of  4GB, 8GB+ recommended


    Install Instructions:


    1. Download all the files by click the download button below and extracting all the files using any extracting tool you have.

    2. Double Click Dragon_Dictate_EN_4.0 [PreCRACKED].dmg to start installation

    3. Once mounted a new window will open.

    4. Drag Dragon Dictate 4.0 icon to the app folder and start Dragon Dictate

    5. Go back to the mounted “dmg file” and double click the license file to register the program, and click [ok]

    6. Done and enjoy!


    Download DRAGON DICTATE MAC

    Friday, September 23, 2016

    All Tech Buzz Responsive Blogger Template.


    Responsive Blogger Templates are rather used for media devices like mobile phones and tablets. Just because simple blogger templates are not compatible all screen sizes. We can also say that, the template or blog design is not visible properly on random devices. So to solve that issue we use responsive designs. By using responsive blogger template all scrolling system on small screen get fixed. Thus, other unwanted features can be hided. It will properly fit on our mobile or tablet screen. Therefore, we can read articles properly.
    Responsive designs are fit according to the screen or are therefore, adjustable according to the devices. Suppose if the user uses a smartphone and visit any website or blog. Then blog design will adjust according to the mobile screen. Approx 50% of blog visitors use smartphones/tablets. So if we don’t use responsive design on our blog then it will effect on Adsense earning due to low CTR (Click Through Rate). Sometimes it becomes difficult to find best responsive blogger templates because most of them are premium. Therefore, its not easy to find and choose free responsive blogger templates which works perfectly.
    Live Demo

    Download here


    Key Features:


    • Fully Responsive Blogger Template.
    • SEO Optimized and well coded.
    • Responsive 4 column stylish footer.
    • Sticky Post Feature.
    • Conditionally Loaded Social
    • Subscription buttons and scripts.


    Safe Tricks Responsive Blogger Template.


    Safe Tricks Responsive Blogger Template.


    Responsive Blogger Templates are rather used for media devices like mobile phones and tablets. Just because simple blogger templates are not compatible all screen sizes. We can also say that, the template or blog design is not visible properly on random devices. So to solve that issue we use responsive designs. By using responsive blogger template all scrolling system on small screen get fixed. Thus, other unwanted features can be hided. It will properly fit on our mobile or tablet screen. Therefore, we can read articles properly.
    Responsive designs are fit according to the screen or are therefore, adjustable according to the devices. Suppose if the user uses a smartphone and visit any website or blog. Then blog design will adjust according to the mobile screen. Approx 50% of blog visitors use smartphones/tablets. So if we don’t use responsive design on our blog then it will effect on Adsense earning due to low CTR (Click Through Rate). Sometimes it becomes difficult to find best responsive blogger templates because most of them are premium. Therefore, its not easy to find and choose free responsive blogger templates which works perfectly.

    Key Features: 

    • Neat and Clean and well coded Design and easy to customize from Template customizer. 
    • Fully Advance Responsive Blogger Template. 
    • Fully SEO optimized For Articles and Images.
    • Features Box Label Wise.
    • Inbuilt Widget.

    Download + Demo: 


    Demo
    Download

    Monday, September 19, 2016

    Embed PDF and other Documents In Blogger Blog Posts

    Embed PDF and other Documents In Blogger Blog Posts
    There are many ways through which we can embed PDFs or other documents like Microsoft Word, Spreadsheets, PowerPoint Slides, and Excel Spreadsheets into our Blogger Blog. However, Google Docs is probably the most authentic and reliable way of embedding the PDF documents in a website. Therefore, today in this article, we will show you How to Embed PDFs or any other documents in Blogger Blog Posts.

    First, go to https://drive.google.com  and Sign in into your Gmail or Google account so that you have the admin privilege to the documents that would upload from your system hard drive. 

    After signing in to your Google account, the next thing is to upload a PDF file from your system hard drive. On pressing the upload icon from the left side panel a drop down menu will pop out which would consist of two options i.e. File and Folder. Just select “File” and head to the next step.

    Now it will inquire you to select the PDF (document) that you want to embed on your website. Now press the open button and move to the next step.
    On pressing the open button a small upload wizard would appear on the right side of your screen. It usually takes a minute or two to upload, but it entirely depends upon the size of your file and the speed of your internet connection.

    Once uploading is finished, click on the file name and it will take you to a new page. Before, you can embed the document you have to change the permission of the file to the public. Thus, select the share button displaying at the top right corner of your screen and change the permission of the file from private to open.

    Press change, and select “public on the web” so anyone on the Internet can find and access. No sign-in required. Finally, press the Save button to conclude the wizard. For detailed instructions, check out the following screenshot.
    After changing the permission settings, now it’s time to grab the embed code. From the quick access tool bar select File >> Embed this PDF file. Now a new window will appear which would provide you the Embed code, copy the whole code and proceed to the next step.

    After copying the code go to Blogger.com >> Create a new Post >> Select HTML Tab, and paste the code where you would like to see the document to appear. Now within the code that you pasted few moments a go search for /preview and replace it with /edit?usp=sharing. Now publish your article, and that’s it. See the following screenshot.
    By default the width of the document is set to 640 pixels while the height is set to 480 pixels. You can reduce the width and height according to your needs. You should now see a PDF attached to your blog posts along with some significant options like download and etc.

    Sunday, September 18, 2016

    ADOBE ACROBAT XI PRO WITH CRACK SERIAL KEY

    ADOBE ACROBAT XI PRO WITH CRACK SERIAL KEY
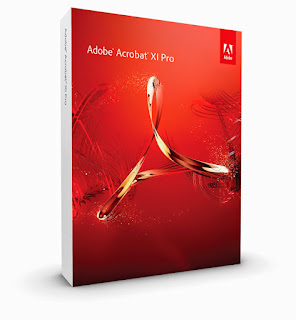
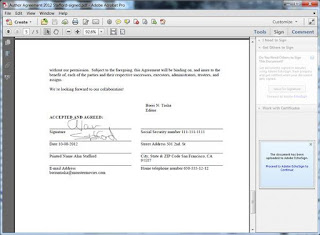
    Adobe Acrobat XI Pro Crack with Serial Number is a such an office tool that lets users create PDF files, PDF forms or PDF portfolios, as well as combine files into a PDF, or share them by using SendNow Online or email. Make your job easier every day with Adobe Acrobat XI Pro software. Quickly create PDF files or PDF Portfolios. Intuitively edit PDF files from within Acrobat or convert them to Microsoft Word, Excel, or PowerPoint formats. Build forms in minutes with the new, included Adobe FormsCentral desktop application. And use guided Actions to automate document preparation. All in all, Adobe Acrobat X Pro provides numerous tools for editing, personalizing or easily sharing PDF files. Download your copy of Adobe Acrobat XI Pro Crack Serial Number Full Version below.

    System Requirements:

    1.3GHz or faster processor
    512MB of RAM (1GB recommended)
    1.85 GB of available hard-disk space
    1024×768 display
    DVD-ROM drive
    Internet Explorer 7, 8, 9, or 10; Firefox Extended Support Release; Chrome
    Video hardware acceleration (optional)

    More information about system requirements https://helpx.adobe.com/acrobat/kb/system-requirements-acrobat-family-products.html

    ADOBE ACROBAT XI PRO WITH CRACK SERIAL KEY
    Install Instructions:

    1. Click the download button below

    2. Unpack using WinRAR or Unarchiver and install

    3. Use the key generator to generate a valid serial

    4. Replaced cracked amtlib.dll to installation folder.

    5. Run program and paste your generated key

    6. Done and enjoy


    Download ADOBE ACROBAT XI PRO

    ADOBE ILLUSTRATOR CC 17 CRACK INCL SERIAL KEY

    ADOBE ILLUSTRATOR CC 17 CRACK INCL SERIAL KEY

    Adobe Illustrator CC is a professional vector graphics application designed for creating illustrations, digital graphics, web, video and mobile content. The new Mercury Performance System enhances your workflow, by providing greater speed on large files. Adobe Illustrator provides you with the essential tools that can ensure the best precision for your vector graphics.

    The image-tracing engine makes sure that created vectors are accurate and have a clean look. Gradients can be applied directly on objects or on strokes, while offering you full control over opacity and placement. It provides you with the essential tools that can ensure the best precision for your vector graphics. The image-tracing engine makes sure that created vectors are accurate and have a clean look.


    System Requirements for Adobe Illustrator:


    Intel Pentium 4 or AMD Athlon 64 processor; 64-bit support required
    1GB of RAM (3GB recommended) for 32 bit; 2GB of RAM (8GB recommended) for 64 bit
    2GB of available hard-disk space for installation; additional free space required during installation (cannot install on removable flash storage devices)
    1024×768 display (1280×800 recommended)
    Broadband internet connection and registration are necessary for required software activation, validation of subscriptions, and access to online services.
    ADOBE ILLUSTRATOR CC 17 CRACK INCL SERIAL KEY

    How to Install and Activate Full Version:


    1. Click the download button below and extract all the files using WinRAR or any file extracting software you have.

    2. Install application from “Adobe Illustrator CC” folder by double clicking on the Set-up file (with admin rights on your system of course.)

    3. Select TRY install. Click on “Sign in Later” If you have Adobe account select “Not your adobe ID”

    4. Make sure you select your language. You can not change it after installation.

    5. Open the application as trial, select “Sign in Later” again and select “Continue trial” and close.

    6. Install updates by double clicking on AdobePatchInstaller for 64 and 32 bit in the “Update” folder.

    7. Double click on “Adobe CC Anticloud” file in the “crack” folder

    8. That is it! Open the application and enjoy full version of Illustrator CC


    Download ADOBE ILLUSTRATOR CC 17

    CINEMA 4D R17 CRACK WITH SERIAL KEY


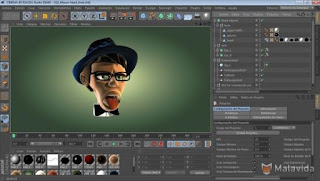
    Cinema 4D turns almost any computer into a 3D animation studio with enhanced architecture promises workstation performance on consumer hardware, so you can build your own animation studio with less investment than ever before. It is an ideal choice for all graphic designers looking to add 3D to their toolset. It’s prime’s intuitive interface is designed to ease you in to the powerful and exciting world of 3D graphics. Cinema 4D is a full-featured software package that looks and works like a dedicated animation hardware platform. Download now and get the full free version below.

    System Requirements:


    Operating System

    Windows 7 and above
    Mac OS X 10.9.5 or higher


    General


    A RAM of 4GB and above
    Graphics card with OpenGL support
    USB ports

    CINEMA 4D R17 CRACK WITH SERIAL KEY

    Installation Instructions:


    1. Click the button below to start downloading your file.

    2.. Click setup to begin the installation process.

    3. Fill out your name, street, company address and everything else. Whether the details are real or not, you need to fill it out or else you’ll won’t continue.

    4. Now copy and paste in the serial code from “serials.txt”


    Download CINEMA 4D R17

    Friday, September 16, 2016

    ADDICTIVE DRUMS 2 CRACK PLUS SERIAL KEY

    ADDICTIVE DRUMS 2 CRACK PLUS SERIAL KEY

    Addictive Drums 2 is a fully-featured and robust OS X application designed to provide all the tools and features required to create custom drum tracks for a wide variety of music genres. It features a user-oriented and streamlined interface from which you have quick and easy access to three drum kits, thousands of MIDI rhythms and a long list of producer presets, all designed to speed-up the process of designing drum-based music tracks. It makes it easy to employ thousands of fills and beats designed by professional drummers, and include them within your own music productions by drag and dropping into your DAW host. Download and enjoy Addictive Drums 2 full version.


    System requirements

    For PC:

    Windows XP / Vista / 7
    2GHz Pentium 4
    1.5GB RAM
    3GB free hard drive space
    DVD drive (optional)
    For MAC:

    OS X 10.4 / 10.5 / 10.6
    G5 or IntelMac
    1.5GB RAM
    3GB free harddrive space
    DVD drive (optional)


    Installation and Activation Instructions:

    1. Click the button below to start downloading Addictive Drums 2.

    2. After that extract all the files using any extracting program like WinRAR or UnRAR

    3. Proceed with the installation peocess. Enter your computer ID.

    4. Replace Resources.xpak file with one from keygen which is located inside the crack folder.

    5. Use authorization code from keygen to unlock

    6. Run the program again and now it is unlocked!


    Download ADDICTIVE DRUMS 2

    VIRTUAL DJ PRO 8 FULL CRACK WITH SERIAL KEYS


    VIRTUAL DJ PRO 8 FULL CRACK WITH SERIAL KEYS

    VirtualDJ Pro 8 is the hottest AUDIO and VIDEO mixing software, targeting DJs from the bedroom, mobile, and professional superstars like Carl Cox. With VirtualDJ’s breakthrough BeatLock engine, songs will always stay in beat, and the DJ works their mixes incredibly faster than they ever could. The automatic seamless loop engine and synchronized sampler lets the DJ perform astounding remixes live, with no preparation at all. The visual representation and the cues allow a DJ to clearly see the song structure, and never be surprised by a break. The vinyl controls will let you scratch like on a real turntable, except that with the beatlock engine your scratches will never end out of the beat. Download Virtual DJ Pro 8 full version free today!


    Minimum system requirements:

    Intel® Pentium® 4 or AMD Athlon™ XP
    1024×768 resolution
    DirectX compatible soundcard
    512MB RAM
    50MB free on the hard drive

    VIRTUAL DJ PRO 8 FULL CRACK WITH SERIAL KEYS

    Install Instructions:

    1. Download Virtual DJ Pro 8 files below by clicking the download button

    2. Extract all the files using WinRAR or any extracting tool. It may take a while to extract so please be patient.

    3. Run setup file to start the installation process but after that please DO NOT run the program.

    4. Locate the VDJ install directory which is usually located at : c:/Program Files/VirtualDJ unless you change it during the installation process.

    5. Copy virtualdj_pro file from the crack folder into your VirtualDJ folder replacing the old one

    6. You can now run VirtualDJ with all the professional features! Enjoy


    Download VIRTUAL DJ PRO 8

    Thursday, September 15, 2016

    Madfinger Realistic RPG action android games

    Aren't you bored of playing rolling and running games with your android? If you want to see some actions and real graphics then this post is a piece of cake for you.

    So lets see what is Madfinger??

    Madfinger: 

    Madfinger was founded in 2009. 
    Madfinger Games is a mobile game developer located in the Czech Republic. They have produced titles including UNKILLED, Shadowgun, Shadowgun: DeadZone Dead Trigger, Samurai: Way of the Warrior and BloodyXmas. The studio consists of experienced developers who worked on titles such as Mafia: The City of Lost Heaven, Vietcong and Hidden and Dangerous 2.

    Games by Madfinger:

    Some of the games developed by Madfinger are mentioned above and will be in list below with details.

    Shadowgun – 2011


    Shadowgun is a 2011 third-person shooter developed and published by Madfinger Games for iOS, BlackBerry PlayBook and Android.
    In Shadowgun, players use virtual touchscreen controls to control the protagonist, John Slade. The controls feature an analog stick on the left used for movement, and context sensitive action buttons on the right, used for firing or interacting with the environment. A major component of Shadowgun's gameplay is its cover system, which allows players to use cover when necessary, with Slade hiding behind walls and barriers to avoid enemy fire, and opening fire himself at opportune moments.

    Download shadowgun

    You can download it  by clicking below button. 

    Shadowgun Google play
    Shadowgun iTunes

    Dead Trigger – 2012

    Dead Trigger is a zombie-themed first person survival horror video game developed and published by Madfinger Games. It was released on June 2012 for iOS and Android mobile devices. The game is single-player only. A sequel, Dead Trigger 2, was released in 2013.

    Download 


    DeadTrigger iTunesDeadTrigger Google play

    Shadowgun Deadzone – 2012


    The best looking multiplayer sci-fi shooter for mobile devices.
    „Shadowgun: DeadZone is one of the sharpest-looking shooters we've seen.“ – SlideToPlay
    „They’ve made what could be the best multiplayer shooting experience on a mobile device.“


    Shadoegun deadzone

    Dead Trigger 2 - 2013

    Dead Trigger 2 is a zombie-themed first person survival horror video game developed and published by Madfinger Games. It was released for Android and iOS devices on 23 October 2013, and for Facebook on 20 February 2014.


    Dead Trigger 2

    MANGA STUDIO EX 5 CRACK SERIAL KEYS FULL

    MANGA STUDIO EX 5 CRACK SERIAL KEYS FULL

    Manga Studio EX 5 is a comprehensive application that comes in handy for artists who need to create incredible illustrations, comic, manga and graphic novels using an intuitive environment. It gives you the power and flexibility to easily create professional-quality comics, manga, and illustrations. Draw naturally using a tablet and recreate the incredible sensation of drawing on paper. Save time with thousands of built-in tones.

    See your projects come to life when you choose from dozens of special effects and image adjustment features. Import and export to many common file formats including layered PSD, BMP, JPG, TGA, and PNG. Manga Studio is your all-in-one solution for professional, ready-to-publish manga and comics from start to finish, all with easy-to-use tools, filters and special effects. Download Manga Studio EX 5 free full version today.


    System Requirements:

    Processor: Intel Pentium Processor or AMD Processor 500MHz or higher

    RAM: Atleast 512 MB RAM minimum (1.0 GB or more recommended)

    Space: 2.6 GB or more hard disk space (3.1 GB or more recommended)

    Display: XGA (1,024 x 768), SXGA (1,280 x 1,024) 16-bit color display

    Pen Tablet (recommended): Wacom Bamboo, Graphire, Intuos, Cintiq, PL series etc.

    Printer (optional): 600 dpi or 1,200 dpi laser printer recommended.

    Scanner (optional): TWAIN 32 compatible

    DVD-ROM Drive


    Installation Instructions:

    1. Download all the files below by clicking the download button.

    2. Install application by double clicking Manga Studio EX 5 Setup file with admin rights on your system.

    3. Once the installation process is done, open the application.

    4. Run the file “xf-sms504ex” inside the crack folder and then click on Generate, copy and paste it in to application. Click on “Register license”.

    5. Select “Verify license right now” ==> Next and then Select “Perform manually” ==> Next

    6. Click on “Activate” button and generate a activation code in the keygen.

    7. Copy this code to application and click “Next”.

    8. Do not update the application

    6. IMPORTANT: Stop Manga’s internet connection with your firewall and open your general internet connection.


    Download MANGA STUDIO EX 5

    FINAL DRAFT 9 CRACK WITH SERIAL KEY FULL

    FINAL DRAFT 9 CRACK WITH SERIAL KEY FULL
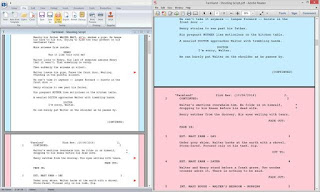
    Final Draft 9 is without a doubt the industry’s leading software for screenwriting. It is used in virtually every writer’s room across Hollywood and endorsed by such heavyweights as James Cameron, Tom Hanks and JJ Abrams. The most noticeable change you’ll see in Final Draft 9 is that it now supports the MacBook Pro’s Retina display. It also adds non-speaking characters to the Navigator, which helps you keep track of all characters in a script. Get your free copy of Final Draft 9 today.


    Minimum System Requirements:

    For PC users:

    Microsoft® Windows 10, 8, 7, Vista or Windows XP
    Intel Pentium III processor and above
    At least 512 MB of RAM
    50MB available hard drive space for storage
    CD-ROM drive or Internet connection (optional)
    For MAC users:

    Mac OS X v10.4.11 or later
    G4 processor or better
    Minimum 512 MB of RAM
    50 MB available hard drive space
    CD-ROM drive or Internet connection (optional)

    FINAL DRAFT 9 CRACK WITH SERIAL KEY FULL
    Installation Instructions:

    0. Click the download button below to start downloading your file.

    1. Extract all the files, use WinRAR or any extracting software you have right now. Proceed with the installion process by double clicking on “Final_Draft_9.0.2.136”

    2. Copy “Final Draft” file inside the “Cracked” folder and paste it into deafult installation folder by replacing. It is usually located at C:\Program Files (x86)\Final Draft 9 OR C:\Program Files\Final Draft 9

    3. After that run the application. Please do not update the program or else it revert back to Trial mode.

    4. Have fun and ejoy this release!


    Download FINAL DRAFT 9

    LOGIC PRO X 10 FULL CRACK WITH SERIAL KEY

    LOGIC PRO X 10 FULL CRACK WITH SERIAL KEY
    Logic Pro X is the most advanced version of Logic ever. Sophisticated new tools for professional songwriting, editing, and mixing are built around a modern interface that’s designed to get creative results quickly and also deliver more power whenever it’s needed. Logic Pro X includes a massive collection of instruments, effects, and loops, providing a complete toolkit to create amazing-sounding music. Get a copy of Logic Pro X now.

    What’s new in Logic Pro X? Logic Pro 10.1 provides you with the most advanced new highlights for EDM and Hip Hop track creation and huge amounts of upgrades to streamline a wide range of music generation. Get all the more new sounds and all the more effective apparatuses that keep the imaginative procedure streaming.


    In order to perfectly run Logic Pro X 10.1.1 you will need to have these kind of System Requirements below:

    4GB of RAM
    Display with 1280-by-768 resolution or higher
    OS X v10.8.4 or later
    Requires 64-bit Audio Units plug-ins
    Minimum 5GB of disk space. 35GB of optional content available via in-app download.


    LOGIC PRO X 10 FULL CRACK WITH SERIAL KEY
    Installation Instructions:

    1. Download all the necessary requirements from the link below.

    2. Extract all the files using iZip or WinRAR if you are planning to run this on PC via VMWare.

    3. Next thing you will do is drag the LPX.app into the app folder.

    4. Open the package by right clicking > Contents > MacOS > Open the logic Pro X file into the terminal.

    5. The install window will open and will ask for a password and then will start to install.

    NOTE: If you are facing the following issue : file or disc damaged (when you launch the .app, after having the .dmg opened correctly) just open Terminal.app paste this :

    sudo xattr -d -r com.apple.quarantine /Applications/Logic Pro X.app


    File Information:

    File Name: Logic Pro X 10.1.1 Full Version Crack
    Updated: Feb 26, 2015
    Version: 10.1.1
    Download Size: 14 MB (Compressed)
    Actual Size:1.06 GB
    Languages: English, Chinese, French, German, Japanese, Spanish


    Download LOGIC PRO X 10

    Tuesday, September 13, 2016

    MASTER PDF EDITOR 2.1.81 FULL INCL KEYGEN

    pdf editor
    Our robust and rich set of features includes the full support of PDF and XPS files, import/export PDF pages into JPG, TIFF, PNG, or BMP formats, converting XPS into PDF and vice versa, and 128 bit encryption. You can also add various controls such as buttons, text fields, checkboxes and more, as well as implement event handlers for predefined user actions such as pressing, clicking, hovering, and scrolling. Powerful commenting tools like Sticky Note and Stamp, as well as enhanced editing capabilities packed in the StrikeOut, Underline, and Highlight functions will make your work easier than ever.

    Installation Instructions:

    -unpack rar archive / Disable the internet 
    -run the setup
    -Use the given keygen to activate 
    -Enjoy!


    Download MASTER PDF EDITOR